Ames Lathes - USA
Ames Millers Ames Triplex Multi-Function Machine Photographs Ames 1940s to 1960s Circa 1835/80 Ames Chicopee Lathe
Although no Operator's Manual was ever produced for Ames lathes, a collection of interesting Sales Catalogues is available. Please email for details
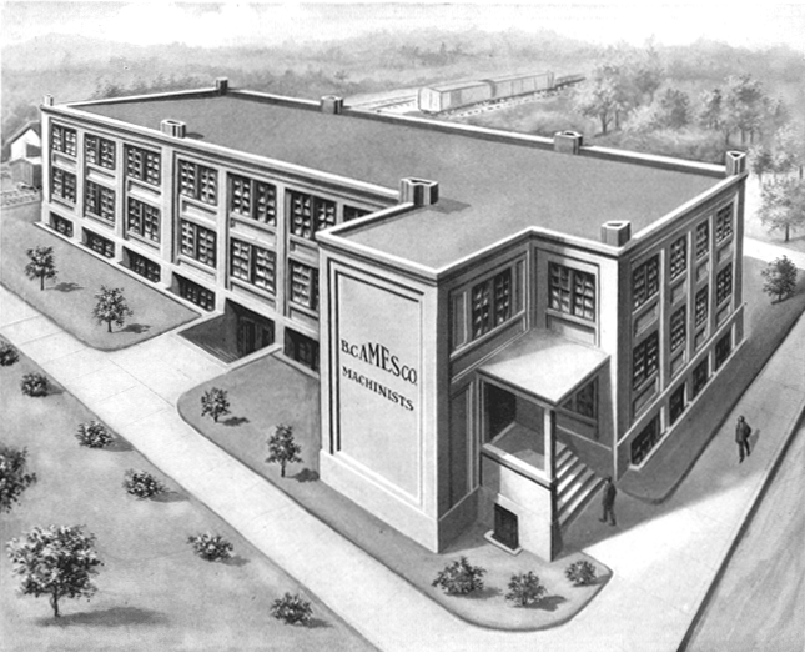
When Bliss Charles Ames opened his machine-tool works on Ash Street in Waltham, Ma. in the late 1890s, he was joining an exclusive club of manufacturers* who, though they produced relatively few machines, made a significant contribution to improving the standards of quality and precision employed in American manufacturing industry. Amongst Ames's fellow high-class machine-tool makers in Waltham were Stark, the American Watch Tool Company, The Waltham Machine Works, Wade and F. W. Derbyshire - with others, including Pratt & Whitney, Rivett, Cataract, Hardinge, Elgin, Hjorth, Potter, Remington, Sloan & Chace and Pearce in other parts of the U.S.A.
Ames quickly became well-known (as the B.C. Ames Co.) for a range of very accurate machine tools and precision measuring equipment; they did not produce a huge number of machines - the specialised marked for precision bench lathes and millers was relatively small and the competition fierce. In the early 1920 an average of one hundred No. 3 lathes were being produced each year, a number that fell to a low of just two or thee at the height of the depression in the early 1930s; sales picked up to nearly fifty a year during the middle to late 1930s followed by an explosion in growth during the years of World War 2 when, if the serial numbers are to be believed, as many as 806 left the factory between 1942 and 1943. The entire range of No. 3 and EH3 Bench Lathes, Bench Millers, Slotters and Shapers were all made until 1957, when production of the lathes only appears to have been continued using dual Stark and Ames branding - the catalogs from that point on (if not the lathes) carrying the names of both companies.
Today the Ames brand still thrives in the precision engineering field and concentrate on high-quality measuring and inspection equipment.
* including: Levin, Bottum, The American Watch Tool Company, B.C.Ames, Bottum, Hjorth, Potter, Pratt & Whitney, Rivett, Wade, Waltham Machine Works, Wade, Pratt & Whitney, Rivett, Cataract, Hardinge, Elgin, Remington, Sloan & Chace, and (though now very rare) Frederick Pearce, Ballou & Whitcombe, , Sawyer Watch Tool Co., Engineering Appliances and Fenn-Sadler the "Cosa Corporation of New York" and UND.
|
|
|
|
|
|
|
|
|
|
|
|
|
|
|
|
|
|
|
|
|
|
|
|
|
|
|
|
|
|
|
|
|
|
|
|
|
|
|
|
|
|
|
|
|
|
|
|
|
|
|
|
|
|
|
|
|
|
|
|
|
|
|
|
|
|
|
|
|
|
|
|
|
|
|
|
|
|
|
|
|
|  |
|
|
|
|  |
|
|
|
|
|
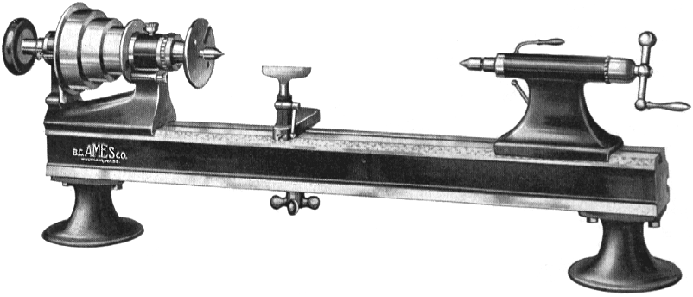
| Ames 83/8" x 21" precision bench lathe 1900 - 1930The small bench machine illustrated above, typical of an Ames lathe, was available with a complete range of screw and lever-feed slides, different tailstocks, various quick-release collet fittings for the headstock spindle, relieving and milling attachments and special accessories for production engineering.
Like many other Precision lathes the Ames' 3-step cone pulley had its smallest diameter by the spindle nose - so allowing the front bearing to be increased in size and surrounded by a greater mass of supporting metal.
Unusually, the spindle carried two rings of indexing holes around the larger of the two pulley flanges - and a further ring of holes around the smaller flange designed to assist in the removal of chucks and collets, etc., from the spindle nose.
Although the beds carried serial numbers, Ames claimed that any headstock, bed and tailstock combination would line up accurately, so allowing the easy transfer of specialised production equipment from machine to machine within a factory. |
|
|
|
|
|
|
|
|
|
|  |
|
|
|
|
|
|
|
| Broaching a hexagon collet using a rack-feed tailstock.
Broaching is a fairly unusual process to carry out on a small lathe but it is perfectly possible, given sharp tools and some care, to make a success of it.
The indexing holes which equipped the headstock of the Ames (and many other lathes) were, of course, an essential part of the procedure. |
|
|
|
|
|
|
|
|
|
|
|  |
|
|
|
|
|
|
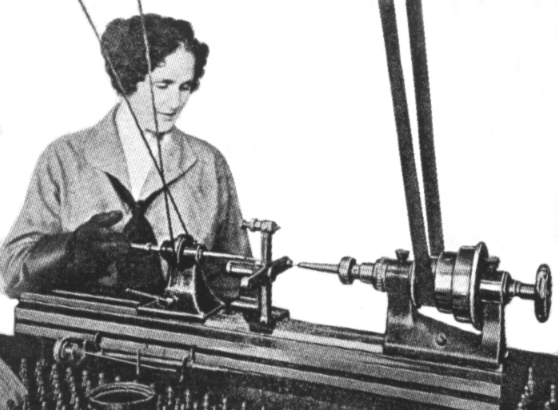
Drilling acetylene torch nozzles with the Tip Drilling Attachment |
|
|
|
|
|
|
|
|
|  |
|
|
|
|
|
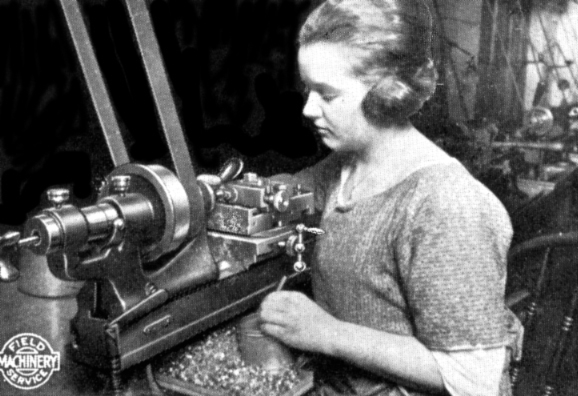
| The Three-bearing Head model in use at the L.S. Starrett works in Athol, Mass. where over one hundred similar Ames bench lathes were employed. |
|
|
|
|
|
|
|
|
|  |
|
|
|
|
|
|
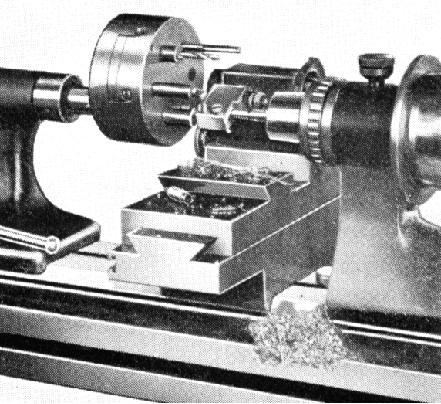
| Once a commonly available accessory for small lathes, the tailstock-mounted indexing turret was a simple and economical way of producing small batches of components.
An ordinary screw-feed tailstock barrel would have slowed the process up more than somewhat, but if lever or rack-operated, and with light work, respectable rates of production could be achieved with very simple tooling. |
|
|
|
|
|
|
|
|
|
|  |
|
|
|
|
|
|
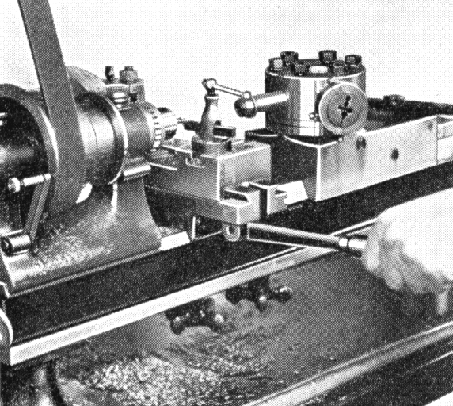
"Half-open" Tailstock in use in conjunction with a two-toolholder lever-feed cross slide. |
|
|
|
|
|
|
|
|
|  |
|
|
|
|
|
|
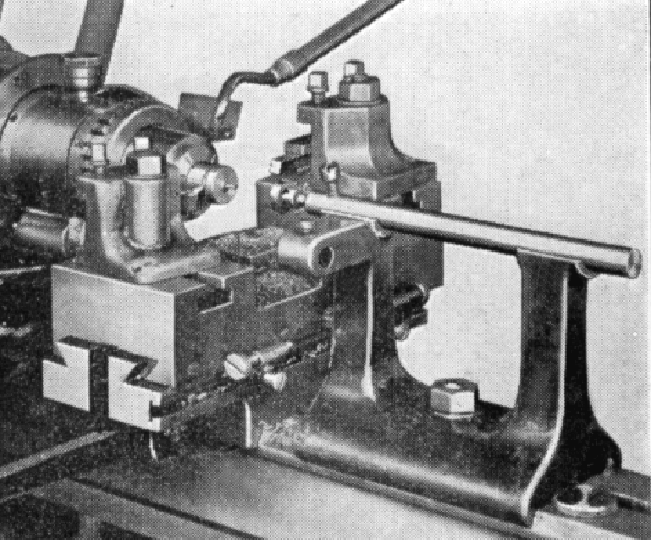
| Six-station, hand-indexing Turret and Lever-action Cross Slide.
The indexing plunger by the rear pulley flange is clearly visible. |
|
|
|
|
|
|
|
|
|
| |
|
|
|
|  |
|
|
|
|
|
| Section through an early Ames bench-lathe headstock.
The headstock was available in two sizes (but of the same centre height) to take collets with a maximum capacity of either 5/8" or 1" with spindle bores of 3/4" and 11/8" respectively. The collets could be of either the draw-in type, or closed by a lever mechanism.
The hardened spindle was machined from a solid bar of alloy steel, case hardened then ground and lapped. This method of production produced a spindle which was hard on the outside but "soft" within - and consequently extremely tough.
The outside of the spindle front was ground to a 4 degree taper onto which faceplates, chucks and the larger sizes of step collets and their closers could be drawn. The inside of the spindle nose was ground to an 11 degree taper to seat and close collets.
The cast-iron headstock bearings, oil-grooved and finely lapped, were parallel on the inside and tapered on the outside. Adjusting nuts, acting on square-section threads, drew the bearings into tapered seats within the headstock casting and compressed them concentrically.
The combination of a hardened steel spindle running in cast-iron bearings was a proven method of obtaining long life and cool running; the spindle end thrust was taken by a ball race, positioned immediately behind the spindle nose, and carrying an adjusting ring to limit end play. The location of the thrust bearing, immediately behind the chuck on the "end" of the spindle, was unknown on any other lathe of this (precision) type.
The larger of the pulley flanges carried two rings of 60 and 72 indexing holes, with a further ring of larger holes around the smaller flange which designed to assist in the removal of chucks and collets, etc., from the spindle nose.
Later Ames lathes followed the lead of Wade in fitting their bench lathes with precision ball-bearing headstocks - the lathe illustrated here is so equipped. |
|
|
|
|
|
|
|
|
|
|  |
|
|
|
|
|
| 3-jaw chuck showing the backplate with its tapered seat which drew onto the 4 degree taper on the outside of the headstock spindle. |
|
|
|
|
|
|
|
|
|  |
|
|
|
| "Step chuck" with its external closing adaptor.
Step chucks were used to hold diameters larger than the headstock spindle would admit. They were made of cast iron and supplied with a 1/4" hole drilled through the centre.
To use them, the face was turned out to a suitable depth and diameter to accommodate the workpiece, which was then tightly gripped as the collet was drawn back against the closing ring. They were made in 2" and 4" diameters for both the 5/8" and 1" capacity headstocks. |
|
|
|
|
|
|
|
|
|
|
|  |
|
|
|
|
|
| The Three-bearing Headstock was designed for production work. An extension at the left-end of the headstock carried a third bearing which supported an integral, quick-action collet opening and closing device.
The device was intended to overcome the inherent tendency of collets to draw work backwards when they were tightened, making it difficult to obtain exact depth setting on repetition work. In this design the collet remained "stationary" whilst, ingeniously, the headstock spindle moved forwards and backwards to tighten and release it.
The mechanism was foot-operated, so leaving the operator's hands free to manipulate the compound slide rest, or other attachments, and feed material into the collet. |
|
|
|
|
|
|  |
|
|
|
|
|
|
| End view of bed showing the double ring of 60 and 72 indexing holes on the spindle-pulley flange. |
|
|
|
|
|
|
|
|
|
|
|
Slide Rests & Attachments
|
|
|
|
|
|
|  |
|
|
|
|
|
| The Ames Compound Slide Rest, a substantial affair which weighed 16 lbs, had finely made feed screws of 0.354" diameter, with milled threads of square form running though bronze nuts.
The top slide could be swivelled through 50 degrees either size of zero and the 45/8" diameter base was clamped by two screws engaging with a circular T slot in the 3.75"-travel cross slide.
Whilst the top slide has the usual generous amount of travel for this type of lathe (5.5"), the cross slide was limited to just 3.75"
The micrometer dials, with bevelled edges, could be zeroed but, like many other lathes of the time, were far too small, being just over 1" in diameter. |
|
|
|
|
|
|
|
|
|  |
|
|
|
|
|
| Lever-action cut-off or "forming slide", used to part off, or turn work to the "form" of a cutting tool. |
|
|
|
|
|
|


CNC lathes are not only accurate but can be run very fast. This leads to increased efficiency and more parts per hour. Humans have limited feed rate ability on manual lathes. Thanks for sharing this post.
ReplyDeleteHimes Machinery